What’s in Barry’s Backpack?
I don’t bring a lot on the trail, but I do like to think that what I do bring along with me is critical for a safe and fun excursion into the wilderness.
As a Wilderness Emergency Medical Technician, we did not have the luxury of pulling equipment off a truck to save lives in the wild. We had to create the equipment with the resources that we had available to us. This shifted the way I think about gear. I want my equipment to have the capability of being used for multiple purposes, for both practical and emergency situations. As a former professional skydiver, I needed to be knowledgeable and comfortable with all of my equipment. My gear, my brain and my ability to use my equipment were the three things that saved my life every time I leapt from an aircraft from 14,000 feet above the ground. Spending time in the wilderness is no different.
This is a list of the gear that I use when I am out spending time in nature. I will cover my thoughts on what’s on my body, what I carry on my back and all the other accoutrements that I bring along.
Full Disclosure: I prefer to hike in fair weather conditions. I grew up in New England and spent my fair share of time in the snow. I don’t have any desire to hike in those conditions. Snow is for skiing, heat waves are for paddleboarding and fair weather is for hiking. As a former Safety & Training Advisor appointed by the United States Parachute Association, I know that accidents are typically preventable and 99% of them are caused by people engaging in activities that surpass their skillset and/or equipment. Be sure to select gear that is appropriate for the conditions. Know the weather and if it is going to be variable, plan for the worst and hope for the best. “It is better to have it and not need it rather than need it and not have it.” This is not a comprehensive list and every environment is going to be different and present its own challenges and needs.
This list is for good conditions and should not be taken as gospel. What is right for me may not be right for you. Please consult a trusted and knowledgeable source before embarking on any outdoor adventure.
First Purchase: Shoes + Socks
Shoes

Since I was a child growing up in the woods of New Hampshire, I have used every shoe under the sun. It is said that Sir Edmund Hillary once declared that “a pound on your feet is equal to 5 pounds on your back”. The United States Army and several other independent studies have backed up this notion. Who am I to argue with the first guy to summit Everest and the US Army? I figure that they probably know a thing or two about putting one foot in front of the other over long distances.
I also spent 15 years falling down and teaching others to do it without breaking their legs, so my personal preference is for a light shoe, but the tradeoff can be stability and durability.
Like Sydney, I’m a huge fan of the Salomon SpeedCross trail running shoes. They’re lightweight, comfortable, and the tread eats mountains for breakfast.
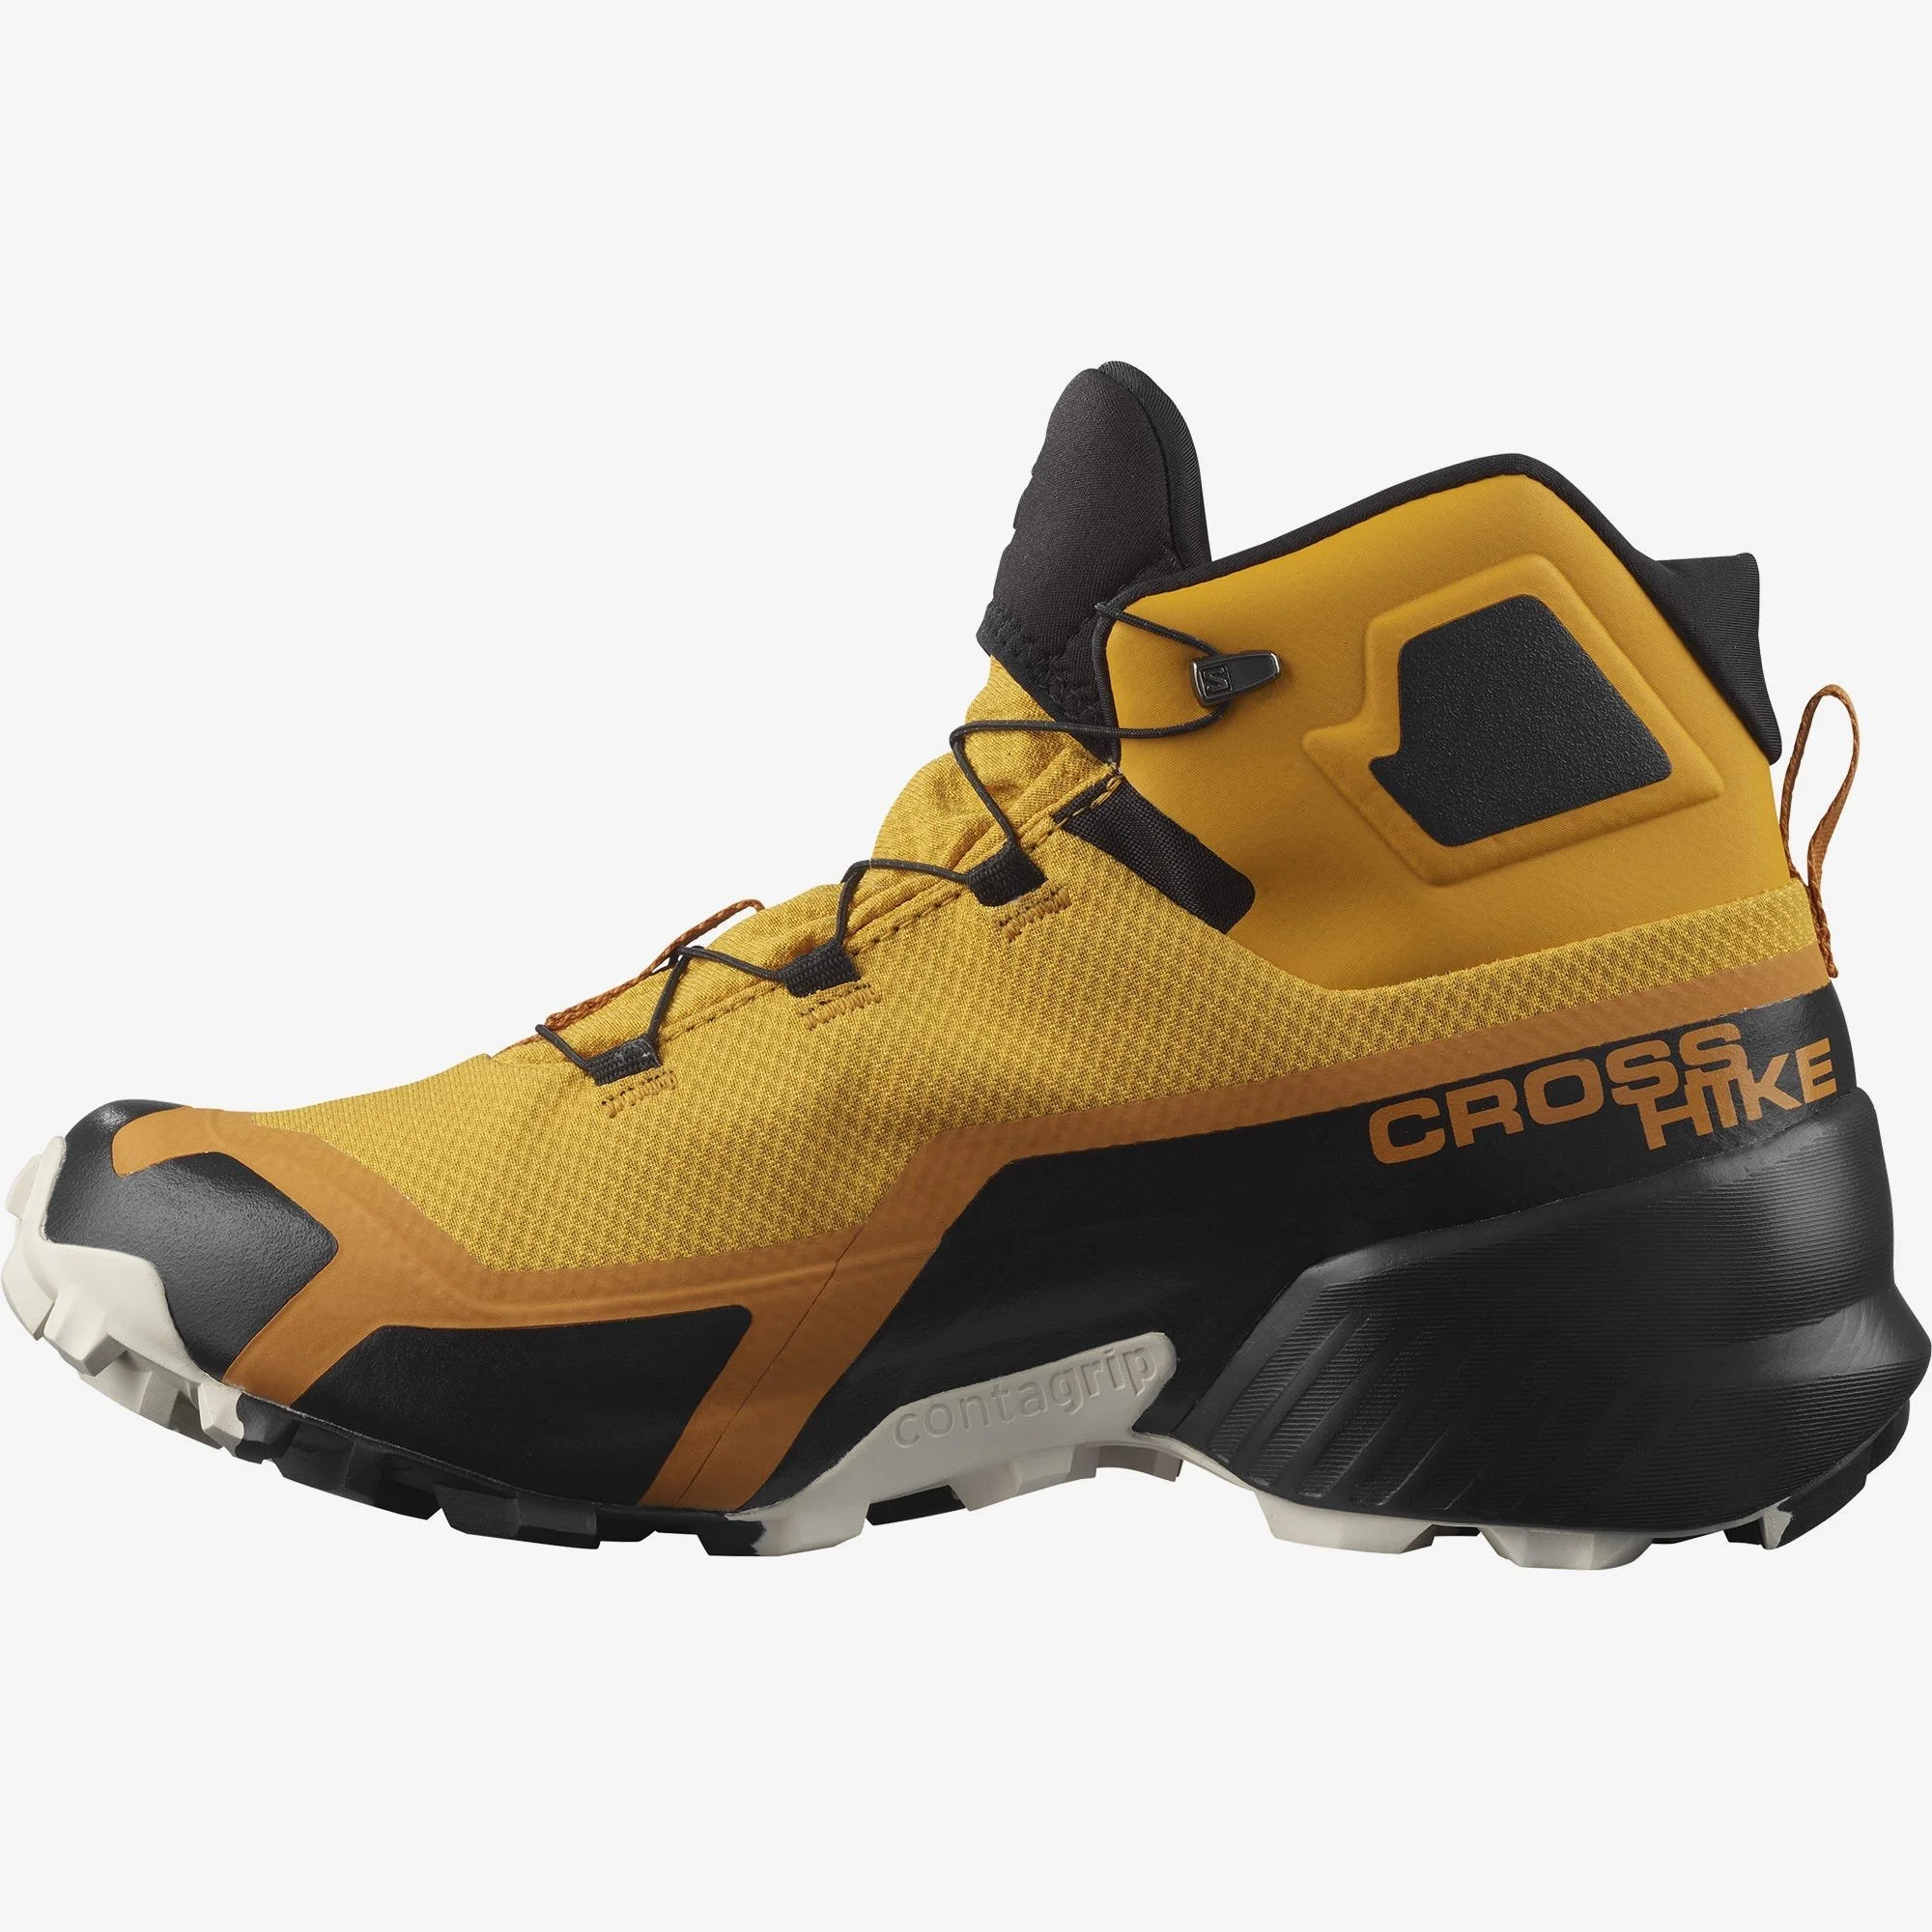
I prefer the Salomon CrossHikes for mid size boots if you need more ankle support or I anticipate wet conditions (these are Gore-Tex) that may increase the likelihood of ankle injury. It’s nice to have options. Something for light, sunny days on the trail and something that can handle less forgiving conditions.
NOTE: I personally don’t see the need for full ankle support with high-cut hiking boots for the casual hiker. If you have full ankle support, it may put more pressure on your tib/fib part of your leg which could give you the potential of having a compound fracture after a fall. A compound fracture is extremely dangerous in the wilderness due to the high possibility of infection. Given the choice: I prefer a broken ankle over a protruding tib/fib.
Socks

Darn Tough makes some darn great socks. Take care of your feet and they will take care of you. Don’t skimp on footwear or socks. I go with the Men’s Merino Wool No-Show Light Cushion Athletic Socks usually, however, if I switch over to my mid Gore-Tex boots, I switch over to the Merino Wool Boot Full Cushion Sock. Plus, this company is from Vermont and I firmly believe that companies based in New England, particularly outdoor companies, make some of the best products on the market. They generally stand up to harsh conditions, the craftsmanship is generally on point and they back up their products. In this case, Darn Tough offers their Darn Tough Guarantee. Their lifetime guarantee is simple and without strings or conditions. “If our socks are not the most comfortable, durable and best fitting socks you have ever owned, return them for another pair.” Tell me. When was the last time you bought a pair of socks with a lifetime guarantee? Right.
Up Next: Clothing
Generally, I am going to carry two sets of clothes for multi-day trips. I have my day clothes and my night clothes. My hiking clothes are going to be more performance-based because they are lightweight, moisture wicking, easy to wash, if need be, and quick to dry. They also offer UV protection. The forecasted weather dictates what I am going to bring. I find that when I am moving all day, I stay nice and warm but I always carry something thermal for cold nights. I rarely hike in heavy clothes because moisture from excess sweating can cause rapid cooling in unwanted situations. Nothing worse than trying to stay warm in wet clothes. When I am done hiking for the day, I switch into my camp clothes. Something comfortable, warm and that retains heat. My camp clothes aren’t too different from what I would wear on a cool rainy day at home. You can always take off layers at night if you are too warm.
NOTE: I don’t feel the need to bring a windbreaker type clothing to protect from wind. I would just bring my rain gear.
ProTip: Waterproof = Windproof.
Underwear
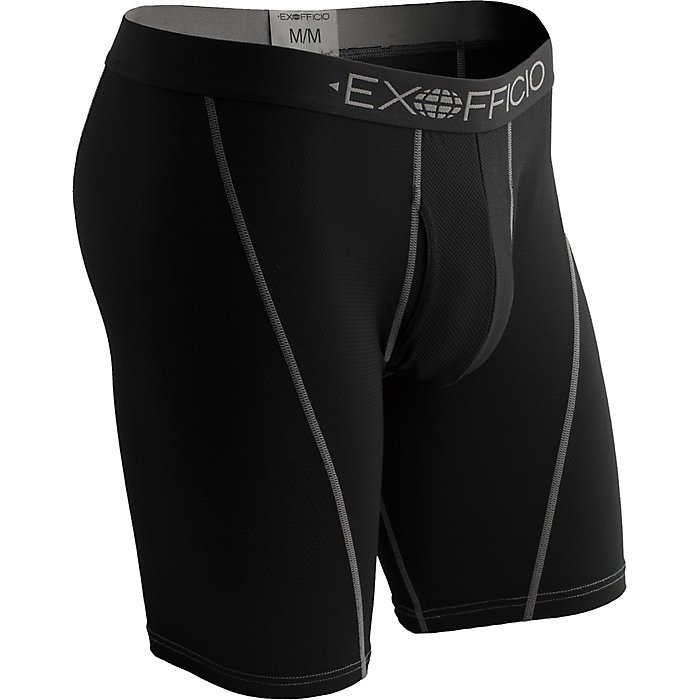
I am usually a cotton boxer type of guy. However, if I am walking over 5 miles, the ExOfficio Give-N-Go Sport Mesh 9” Boxer Briefs are my go-to for smugglin’ grapes. They keep the boys in place. The 9” Sport Mesh prevents chafing of the upper thighs. They are odor resistant and if you feel the need to do laundry on the trail, they dry really quickly. For 99% of you, these will probably be the most expensive pair of underwear you will ever buy... until you buy your next pair when you realize just how much your life has improved by wearing these bad boys. You are welcome.
Base Layers
Base Layers can make the difference between a pleasant outdoor excursion and a frigid day of shivering. Staying warm is all about layering and I absolutely love what SmartWool brings to the table in this department.
Top: Men’s Classic All-Season Merino Base Layer Long Sleeve
Bottom: Men’s Classic All-Season Merino Base Layer Bottom
The Merino wool base layers are thin and lightweight. Perfect for cold days and cool nights. The wool is super soft and wicks away moisture to keep you dry. The offset shoulder and side seams on the long sleeve are designed to increase comfort and minimize chafing while wearing a backpack.
SmartWool earns bonus points for offering plant based dyes!


Moisture-Wicking Hiking Shirt
For an all-day hiking shirt, I chose the Columbia Silver Ridge Lite long sleeve. I prefer the long-sleeve shirts where you can button the sleeves after rolling them to keep them secure. This shirt is nicely vented, is made of quick-dry fabric, and is lightweight. UPF 40 protects my tattoos. If long-sleeve isn’t your jam, a performance tee made of quick-dry materials is a great alternative. I wear a shirt similar to this one by Columbia.


Hiking Shorts
I generally wear pants to protect my legs from scratches, ticks and other insects, but nothing beats hiking in shorts on a hot day when it's appropriate to do so. I prefer to have a bit of stretch for comfort but I also require secure pockets. Something with zippers. That's why I choose a sensible pair of shorts like these from Columbia.

Hiking Pants
My all time favorite trekking pants are from Fjallraven. I have a pair of the Vidda Pro Ventilated Trousers. I hiked over 1,100 miles in these during the #takeahikediabetes campaign. Day in and day out, these pants were able to handle everything that I threw at them. They looked great, they were comfortable and highly functional. I tend to value practicality over anything else and with 6 pockets, these pants are the most functional pants I own. They are highly weather resistant and have more bells and whistles than a carnival midway. 65% recycled polyester/35% organic cotton. Hip to Knee Ventilation Zippers, Reinforced Pre-Shaped Knees with Openings for Knee Pads, Gusseted Stretch Fabric, Fluorocarbon Free Impregnation, Inner Mesh Pocket, Knife Pocket, Adjustable Leg Cuffs, Boot Hooks and Greenland Wax can be applied. Need I say more? I don’t, but I will. Fjallraven also offers free alterations and repairs.

Headwear
Given that I am follicly disadvantaged, headwear is a must. There is nothing more uncomfortable than dealing with a scorched scalp. I often use a soft boonie hat that was gifted to me from Adam Rubin’s Mother. It was Adam’s hat that he used to hike with before he passed away on a BASE jump. It was free and it is soft, so it won’t get crushed when I pack it up. Plus, it has tremendous sentimental value. It has a string that will keep it around my neck in case a rogue gust of wind blows through.
Picking the Right Backpack

Traditional Backpack
Before we started using Ultralight gear, Osprey Exos 48 was my choice for multi-day backpacking trips. I can carry everything I need for a 6-day trip in this rig. It is super lightweight and the breathable mesh Exos peripheral frame will keep your back nice and dry while you are slogging up mountains. Downside: It doesn’t have any lateral hip pockets, so if you are one of those hikers that likes to have quick and easy access to snacks, you will have to come up with another place to put your stuff. That’s what cargo pockets are for, IMO. Also, this backpack does not come with a rain cover. It is water repellant, but if you think you will be hiking in wet conditions, you are going to want to invest in a rain cover to keep your gear as dry as possible or consider another pack. I would also recommend going with a company that specializes in making backpacks. I wouldn’t generally buy a peripheral product from a company because the craftsmanship generally isn’t up to snuff and they probably won’t back up their product if it fails. Osprey offers the Osprey All Mighty Guarantee. They will repair any damage or defect for any reason free of charge – whether it was purchased in 1974 or yesterday. If they are unable to perform a functional repair on your pack, they will happily replace it.

Traditional Daypack
For shorter day hikes, I use the Trailblazer 20 by Salomon. I don’t have any real hangups or recommendations about a day pack. Go for something that is within your budget, comfortable, can hold at a minimum of a 2 liter water bladder (make sure it's fitted for a water bladder. (I swap the bladder in between my two rigs.), snacks, your first aid kit, and the clothes you would need to survive in the wilderness should the temperatures drop.

Ultralight Backpack
When I first wore this Mariposa 60L Backpack from Gossamer Gear, I’m not gonna lie, I felt naked in a bad way. I was so used to the bulk and structure of the Osprey that I was uncomfortable with such a light backpack. After a good dayhike with this backpack loaded, I understood what the fuss is all about with ultralight equipment. What the backpack felt lacking in structure, it made up for in the lightweight nature of it. Ultralight backpacking is a privilege and a luxury, and it makes a huge difference after a long day on the trail. We have backpacked several hundred miles with this backpack and it's holding up very well!

Ultralight Daypack
The Murrmur 36 Hyperlight Backpack from Goassamer Gear is the stuff my dreams are made of. Sydney started her hiking/backpacking adventures with a flimsy daypack from REI (Flash18) and overloaded it with snacks, water, and layers. It dug into her shoulders, and she hated it. When we first tried on our Murmur 36L backpacks, we thought we’d experience the same. But we didn’t. We love this backpack because it’s lightweight, durable, and has plenty of pockets. This is 7.9 ounces of barely-there badassness.

Water Storage + Filtration
I use a 3L water bladder from Camelbak and I swap it between my two packs. You can find much cheaper water bladders on the market, but water is life and this is one area where I do not skimp. I prefer the Camelbak Crux Reservoir for a few reasons. The construction is top notch and the hose has a larger circumference than most brands. Larger circumference means a higher flow of water and the superior construction means that you aren’t making frequent stops on the trail to fix a faulty nozzle assembly. For longer trips where I know clean water sources are going to be scarce. I use a Sawyer Filtration System. It is lightweight and removes 99.99999% of all bacteria, such as salmonella, cholera, and E.coli; removes 99.9999% of all protozoa, such as giardia and cryptosporidium. The filter rated up to 100,000 gallons. When Sydney and I were cruising around Glacier National Park and Grand Teton, we probably didn’t need to filter the water, but we did just to be safe. This is a lightweight solution that doesn’t require batteries. I’ve also used a Steripen, but if your batteries run out, you’re outta luck and outta water.
Other Key Items

Trekking Poles
When I was a youngin’, I thought that hiking poles were for “Old Fogies”. When I hit the ripe old age of 40, it dawned on me that, perhaps, I was an “Old Fogie”. So, I thought I would ease into my golden years with a shiny new pair of trekking poles. I had a pair of adjustable poles for our first trip across Catalina and I am REALLY glad that I did. Trekking poles take a lot of pressure off your knee joints and, used correctly, your leg muscles. They will also add more of an upper body workout. If you are hiking with an extra 30 lbs or so on your back, it makes a big difference. I also find that using Trekking Poles reduces the inflammation in your hands after a long day of hiking.
Bonus Benefit: No More Sausage Fingers!
Trekking poles are a very versatile piece of equipment. Not only can they be used as tent poles but they can also be used in an emergency situation. They can be repurposed as crutches, splints and can also be rigged to hold traction for compound fractures. They can even be used to fashion a litter to transport an injured hiker to safety.
Trekking poles can vary in technology and price. We started out with a basic pair that we bought online and evolved into a lightweight carbon fiber pole.
Trail Buddy poles from Amazon.
LT5 Three Piece Carbon Trekking Poles from Gossamer Gear.

Knife
A good knife is essential for being outdoors. You don’t need to go full Rambo out there, but you are going to want something pretty decent. I prefer the SOG Seal Pup Fixed Blade Tactical Survival Knife with a 4.75” blade. Some people carry a Swiss Army knife, but “That’s not a knife” (Insert Crocodile Dundee voice). I think a Leatherman is a better option for a multipurpose tool.

Fire
To start a fire, I carry a full lighter and a flint-based fire starter from UST Gear. I would recommend practicing with the striker before you have to use one in a real life emergency situation. They can be a bit tricky to use but they last for a long time and even work when they are wet.
Headlamp

I love my Brila 580 Dual Power LED Headlamp. It’s a newer model and offers hybrid technology - you can use traditional alkaline batteries or you can charge the headlamp via USB. This is an absolute must for any planned or potentially unexpected overnight trips. You get various settings for brightness as well as red light functionality to preserve your night vision. Keep in mind that battery life will be affected when exposed to prolonged extreme temperatures. It’s always good to have a spare set of batteries and or USB charger just in case.
Microfiber Cooling Towel
This is a must have for hot conditions. They are cheap, small and lightweight and will make a world of difference on trails that don’t offer much shade. It took me a while to learn this lesson when I moved out on the West Coast. Now, I won’t get on the trail without one. These will keep you cool, provide a bit more sun protection and can be used as a towel. These are the hiking equivalent of having your own personal air conditioner. Heat stroke is a very serious condition and can be fatal. In a pinch these can be used to strain larger particulates out of untreated water sources. Manufacturers also make neck gaiter/headband versions too. You do you and get whatever strikes your fancy. I won’t judge.

Towel
I prefer the Drylite Towel from Sea to Summit. They have various sizes to fit your needs. A lightweight microfiber towel is nice because it serves as two things. 1) a towel and 2) a pillow. I prefer to have a towel that comes with a flat mesh bag (allows for unwanted moisture to escape) so when it's folded up and packed away, it’s the shape of a pillow. I place this into the head part of your mummy sleeping bag and it stays in place all night long.
Sleep System
Sleeping Bag
I prefer the mummy-style sleeping bags. It may seem a bit tight and claustrophobic but you can always unzip it if you get too warm or need extra space. I would rather be too warm than too cold. I am not going to give a recommendation on what temperature rating you need. Be sure to choose the appropriate temperature rating for the weather conditions that you plan on venturing out in. I would also make sure that it comes with a compression sack. If it doesn’t, buy one. It will help make packing it away much easier and will conserve space. Here is an article on how to choose the best sleeping bag for you.

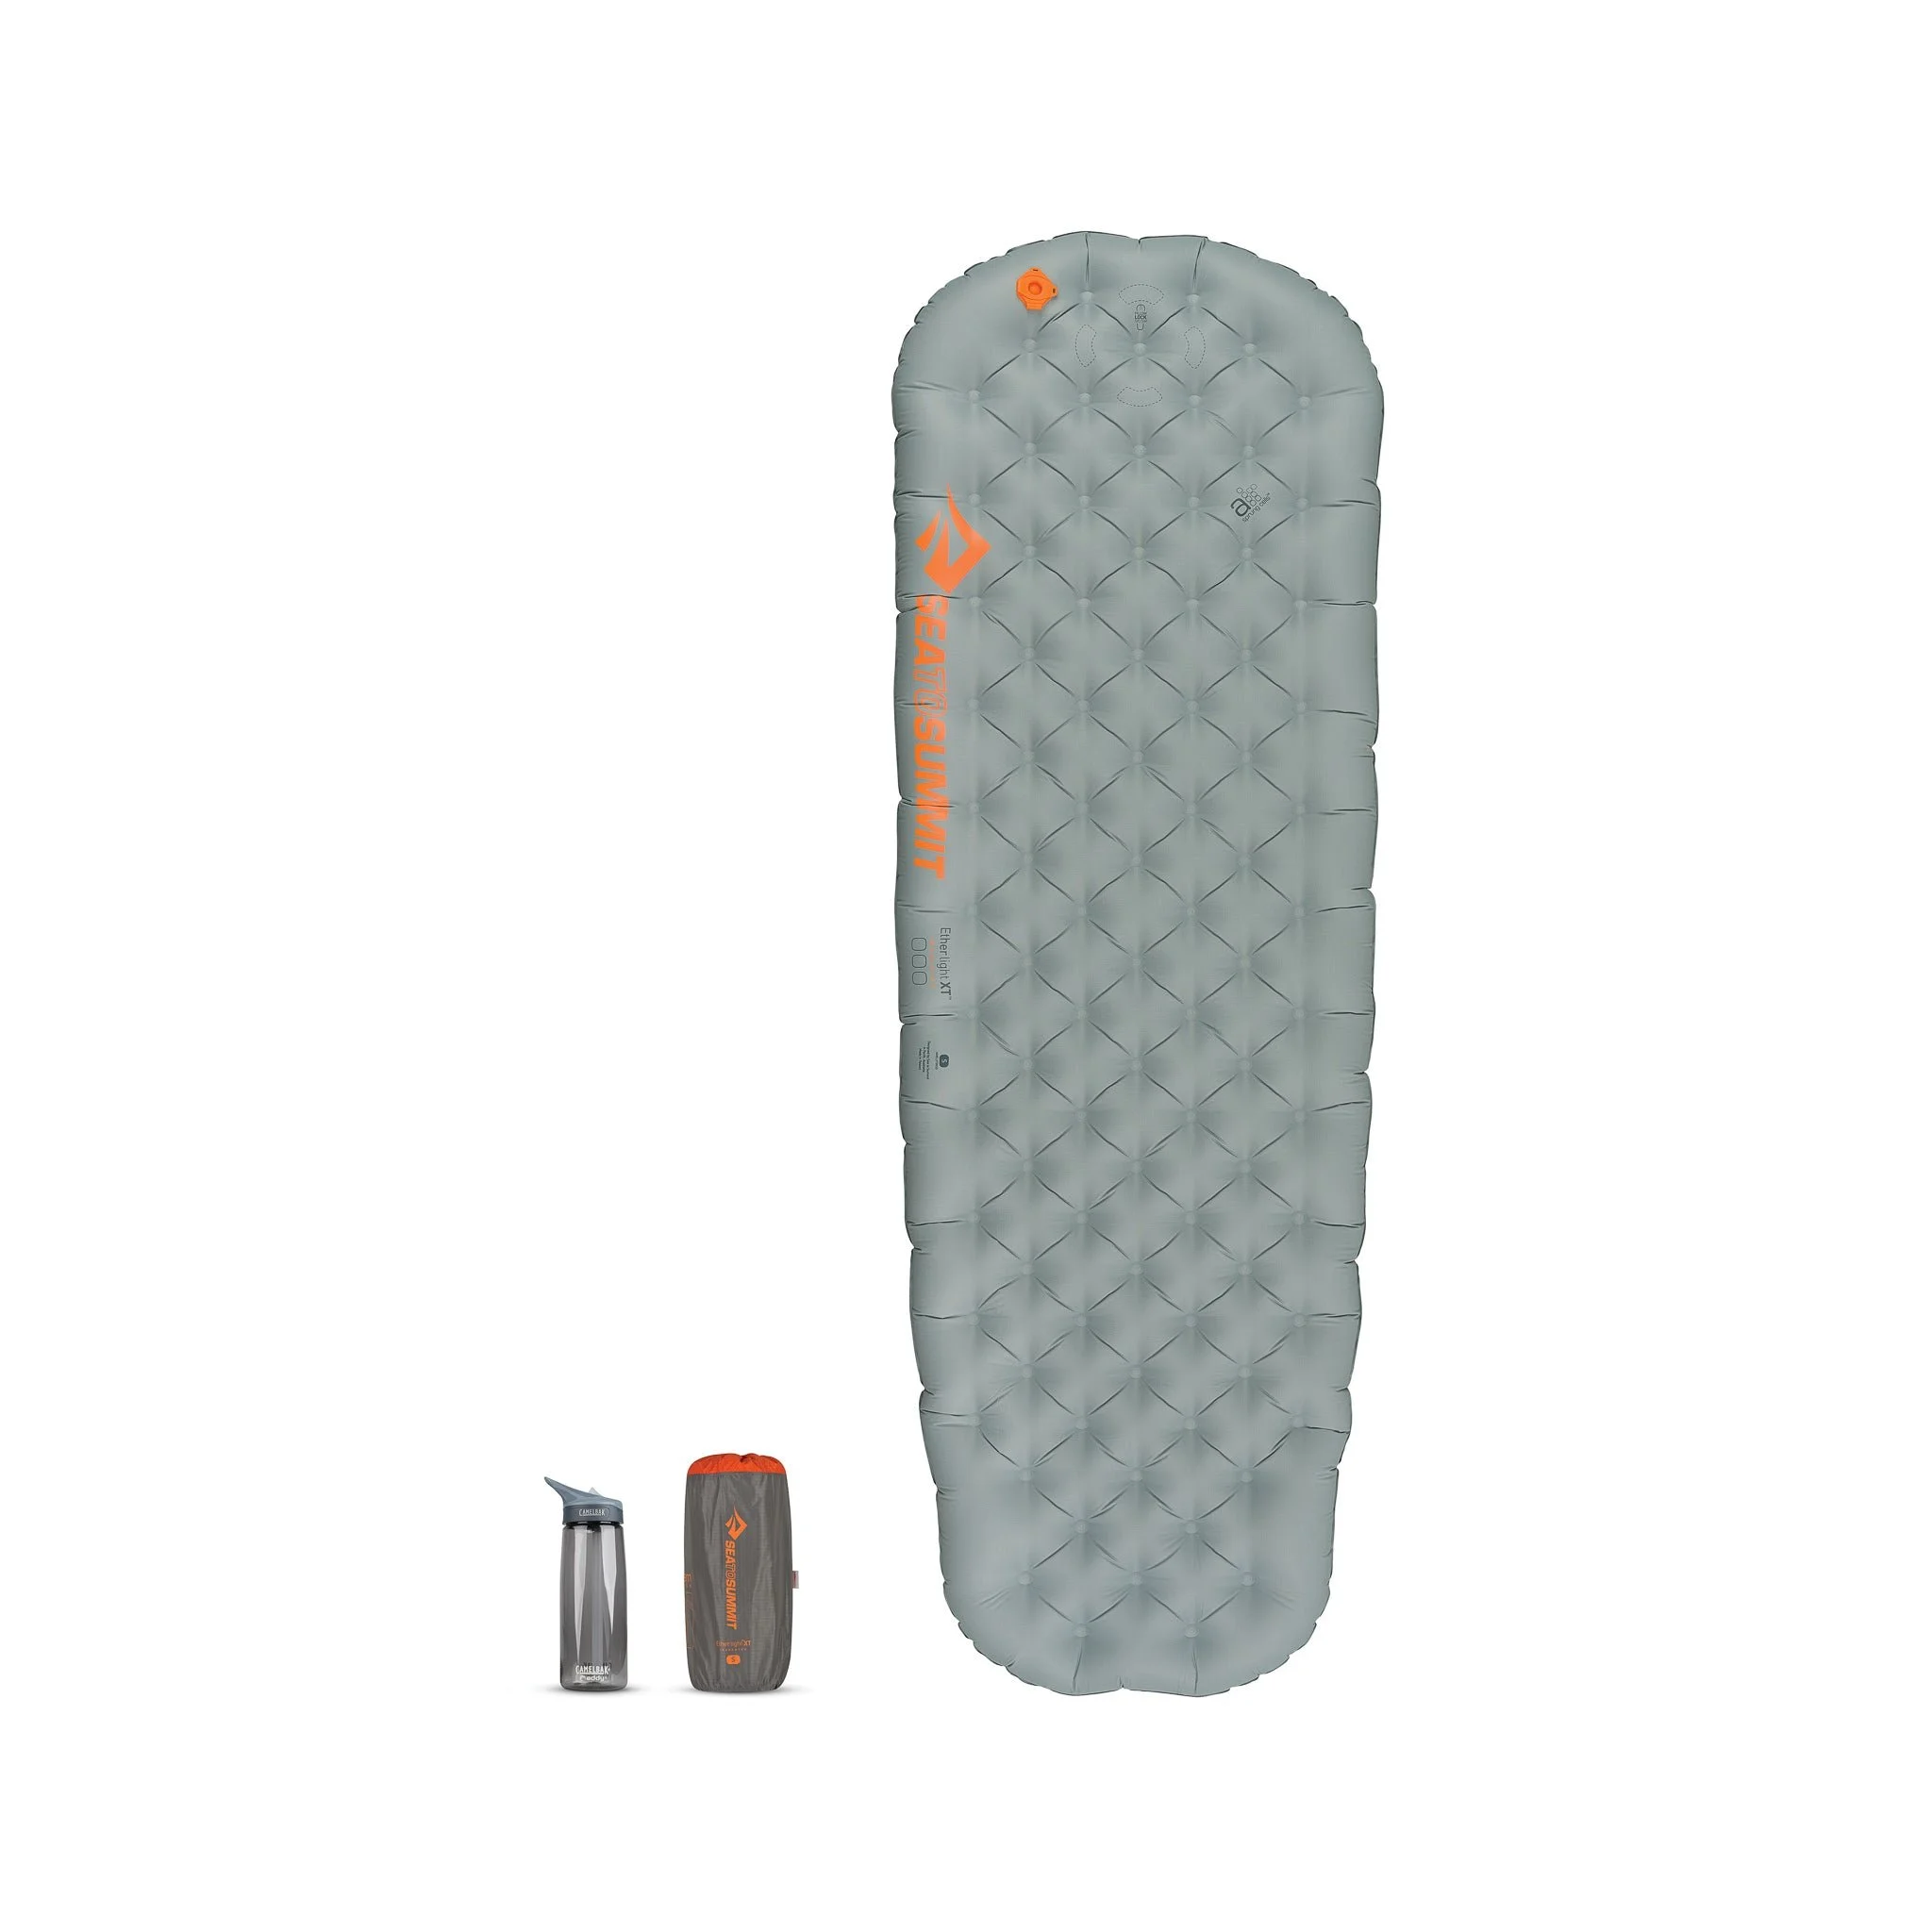
Sleeping Pad
Besides adding comfort after a long day on the trail, a mattress pad will also help prevent heat loss through conduction with the cold ground. I have been through a few pads before. I prefer an inflatable pad over a foam pad for weight and portability while I am in the backcountry. I currently use the Sea to Summit Ether Light XT.
The downside is that these types of pads can develop leaks and pop. It’s important to have some sort of ground cover if you are planning on Cowboy Camping to protect the sleeping pad from popping. I have tried to put the pad inside my sleeping bag. It works, but it is fairly uncomfortable and you also run the risk of tearing your sleeping bag if you do not have ground cover. It is always a good idea to keep the supplied repair kit with you just in case. Here’s a guide on how to pick a sleeping pad.
If you aren’t comfortable on going out in the wilderness to camp and want to set up a tent in the backyard or you are going car camping at your local campground and portability and weight won't be an issue, I would highly suggest the Filmatic Sleeping Mat from UST Gear. This pad is your goldent ticket to getting a good night's sleep. We used these during the #takeahikediabetes tour and absolutely loved them. They are self inflating, so no more huffing and puffing at the end of a long day on the trail and at 4 inches thick, they are REALLY comfortable. They have a padded foam interior which makes them really quiet. No more loud creaking when you adjust your sleeping position during the night. Bonus points for the ability to clip them together to make a larger sleeping surface!

Pillow
I currently use the Sea To Summit inflatable pillow. It packs up smaller than a can of soda and weighs in at 2.7 ounces. If you are a true minimalist, you could use your camp towel as a pillow.
Tent/Shelter
I like to travel light when I am backpacking. Lighter = Expensive. We have the Marmot 2P SuperAlloy tent. It is small and light. And also discontinued. A comparable backpacking tent from Marmot would be the Tungsten 2-Person Tent. If we know that there is ZERO chance of precipitation (which is very common in Southern California) we may decide to Cowboy Camp under the stars, but I will always bring a tarp-style tent to keep us off the ground (conduction is one of the ways we can lose valuable body heat) or put up at makeshift tent or lean-to shelter if there is lots of moisture in the air and I think that we are going to wake up soaked in dew. Having a multi-use tarp like this is great for so many reasons in a survival situation. Don’t leave home without it, no matter what the forecast says. Here’s a guide for how to choose a tent for backpacking.


Sometimes we don’t feel like trekking into the backcountry to sleep under the stars and it’s easier just to car camp. We used the House Party 4 Person Tent from UST Gear while we hiked 220 miles around the city of Chicago in 2021 and we absolutely loved it. It was easily one of the easiest tents to set up and break down. Color coded poles, expandible single wall construction and a nice little easter egg on the inside of the tent. This is a great option when you aren’t counting pack weight.
Cooking System

Stove
After more than a decade of using a solid fuel Esbit stove, we upgraded to a JetBoil Flash. It’s amazing, we loved it, and we were able to prepare meals for two people for five days without running out of fuel in the small canisters. It’s a total win!
And for folks who aren’t trying to spend $100+ on a stove, let’s talk about the Esbit stove. The pot holds enough water for most commercially available freeze dried camp food meals and one tab will bring a full pot to boil at sea level. I dig this stove because I know exactly how much fuel I need to carry. No more. No less. I am not carrying excess weight and I never have the nagging fear in the back of my head that I could run out of fuel. I do always carry a few extra fuel tabs with me to be used as a fire starter in an emergency. There are certainly faster and more efficient stoves on the market, but if it ain’t broke, why fix it? Here’s a guide on how to choose a stove.

Utensil(s)
Sea-To-Summit Alpha Light Spork can handle anything you need to make and it’s super light.
First Aid + Training
We carry a basic first aid kit on all of our hikes. I keep my EMT kit in the van, and in general, I don’t hike with it as it would add a lot of weight and bulk. We also carry a few additional items outside of a basic first aid kit;
Assorted medicines (painkillers, fever reducers, antihistamines, and anti-inflammatories)
Environmentally friendly biodegradable toilet paper
Always follow the Leave No Trace principles! Learn more at LNT.org and always follow local rules and regulations.
I would also recommend attending a Wilderness First Aid, Wilderness Advanced First Aid, Wilderness First Responder or Wilderness EMT Course. The knowledge that you will learn may just save a life. I went through Stonehearth Open Learning Opportunity (SOLO) in North Conway, NH but you can find other educational programs like NOLS in your local community. Your brain is by far the most important piece of equipment to bring into the wilderness! Be sure to provide it with plenty of information along with nutrition and plenty of water.
Be safe. Have fun. Don’t die.
-B